Home
::
GUIDE - RT Go Kart Chassis Assembly


GUIDE - RT Go Kart Chassis Assembly
GUIDE - RT Go Kart Chassis Assembly
CPR RACING GO KART ASSEMBLY SERIES
In our new series, we'll cover assembling one of our popular CPR RT DIY Racing Go Karts. If you've ever wondered just how easy it is to get one up and running, you'll be surprised just how simple and quick the whole process is.
CPR RT DIY Racing Go Karts offer fun for the entire family - and you'll learn how to assemble and disassemble through the process so you can service your racing go kart and keep it running at the front of the field.
In this guide, we walk you through installilng the components of the CPR RT Bare Chassis. If you've bought a CPR RT DIY Go Kart or a CPR Chassis this guide will explain how to assemble your new kit.
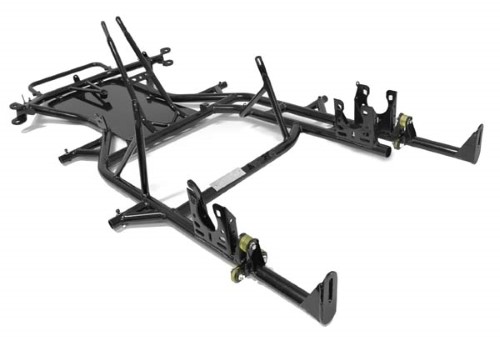
1. Floor Pan
Floor Pan 1 piece *FIT KIT Rear Crash Bar fitting kit (Contains 6x M6x25mm silver Philips head bolts, 6x M6 Nyloc nuts, 6x small black M6 Nylon spacers, 6x M6 Washers)
This part may already be fitted – if fitted, skip this step.
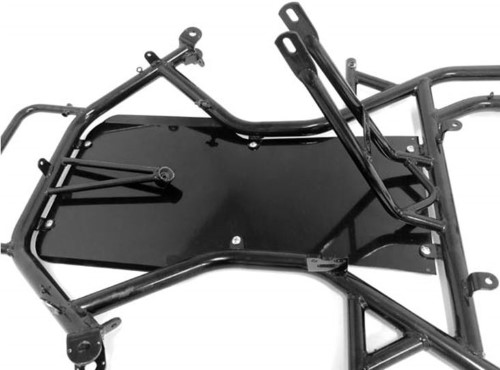
a. Place the floorpan in position as per picture above.
b. Stick small strips of masking tape onto the floorpan, between the floorpan and each of the tabs where the bolts will go through (see bolt locations above)
c. Mark the bolt location holes with a pen, pencil or sharpie
d. Drill 6.5mm holes for the bolts
e. Insert one M6x25mm Philips head bolt in each tab hole, then through one of the small black M6 nylon spacers, then through the floorpan, then through an M6 machine washer and attach a nyloc nut.
f. Lightly tighten the nyloc nut, but allow the floorpan to move so that you can align all the other bolts
e. Repeat the process for all 6x bolts.
f. Align and tighten all nyloc nuts securely.
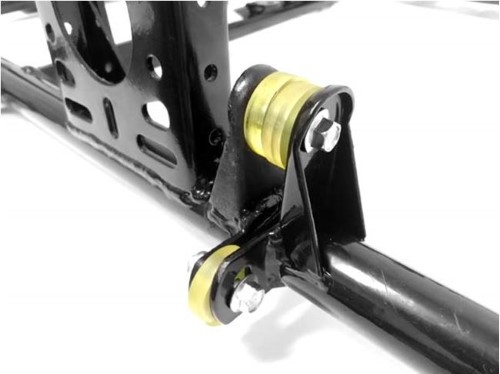
2. Rear Crash Bar
Rear Crash Bar 1 piece *FIT KIT Front Crash Bar fitting kit (Contains 2x M8x25mm bolts, 4x M8x20mm bolts, 6x Nyloc nuts, 2x Nylon spacers – already fitted to rear crash bar)\
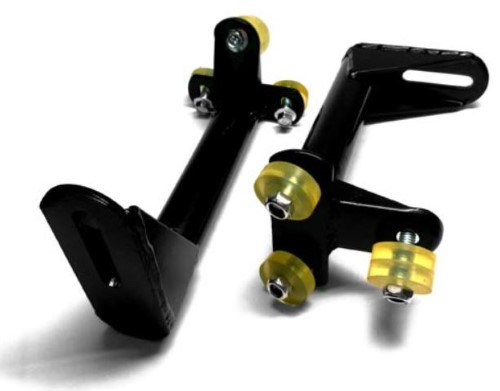
a. Align the bar to the rear chassis mounting points.
b. Insert one M8x20mm bolt into the bottom of the left side mount and one M8x20mm bolt into the bottom of the right side mount. Secure with M8 Nyloc nuts. *Do not tighten.
c. Insert the other two M8x20mm bolts into the two remaining bottom mount holes and secure with two M8 Nyloc nuts. Do not tighten.
d. Insert the two M8x25mm bolts into the top mounts, by inserting through the rear crash bar, then through an M8 nylon spacer, then through the chassis bracket. Secure with M8 nyloc nut.
e. Repeat the process on the other side.
f. Align and tighten all nyloc nuts securely.
3. Front Crash Bar
Front Crash Bar 1 piece *FIT KIT Rear Crash
Bar fitting kit (Contains 2x M6x25mm
Countersunk Black bolts, 2x M6 Nyloc nuts,
2x M6 Washers, 2x M6 Countersunk Washers)
This part may already be fitted – if fitted, skip this step.
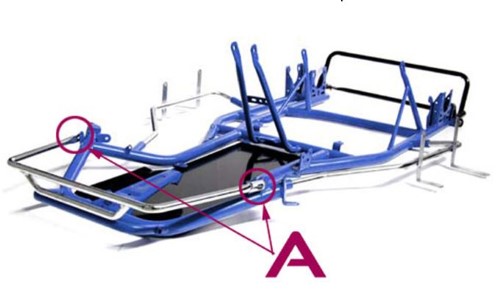
a. Align the bar to the two chassis mounting tabs shown above as ‘A’.
b. Insert one M6x25mm bolt into one M6 Countersunk washer.
c. Push the M6x25 bolt through the hole in the front crashbar and through the hole in the tab on the chassis, then secure loosely (do not tightent) with one M6 machine washer and one M6 Nyloc nut.
e. Repeat the process on the other side.
f. Lightly tighten all nyloc nuts. Do not over-tighten - this component must be able to swivel to lock the nosecone in place later in the build.

Need Help?

Gift Certificates

Categories
Bestsellers


Special
My Shopping Cart
My Shopping Cart
Cart is empty
My Account
Free Same-Day Dispatch!


Product Updates via Facebook

Get notified about our holiday times

We Accept Paypal

Outstanding Service!
