


TTRLC1 Kart Trolley Assembly Guide
TTRLC1 Kart Trolley Assembly Guide
In your package, you should find the following assembly parts:
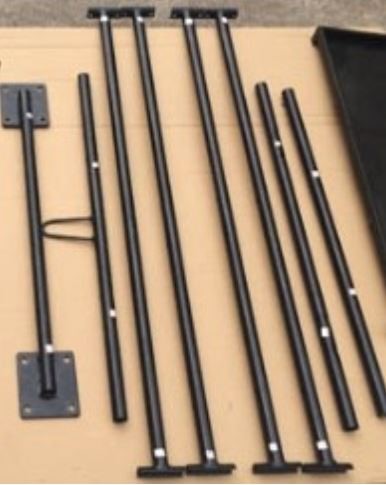
4 Short Pipes
Labeled #1 and #1 Top bar above the front wheel
Labeled #2 and #2 Top bar above the rear wheel
Labeled #3 and #3 Rear wheel bar
Labeled #4 and #4 Front wheel bar
4 Long Pipes
2pcs are Labeled #1 and #3
2pcs are Labeled #2 and #4
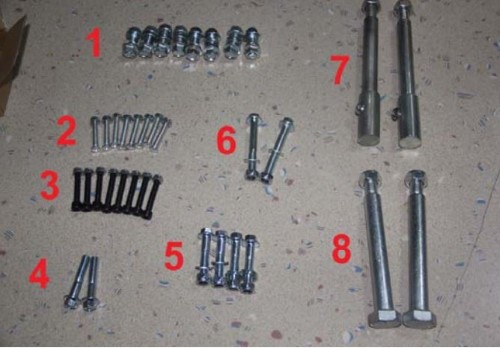
Hardware:
#1 8pcs M10x25 bolts for the front wheel
#2 8pcs M6x35 cross flat top bolts (silver)
#3 8pcs M6x35 hex bolts (black)
#4 2pcs M8x40 hex bolts without nut
#5 4pcs M8x40 hex bolt
#6 2pcs M8x60 hex bolt
#7 2pcs rear wheel axle
#8 2pcs front wheel axle
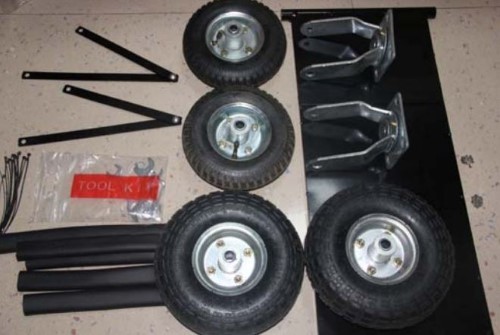
Other Components
2pcs folding support arms
5pcs foam with zip ties
2 pcs large rear tires
2pcs small front tires
2pcs front swivel casters
1pc tool tray
1pc tool kit bag
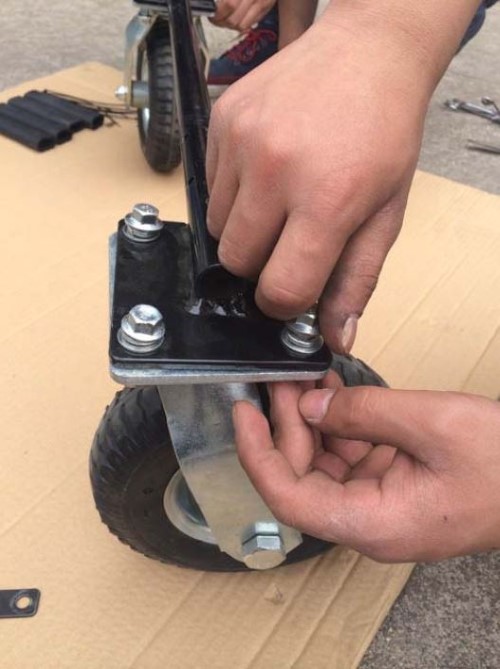
Step 1: Assemble the Front Wheels
Use the pipe labeled #4 and #4 and 8pcs M10x25 (#1) bolts for the front wheel. Using hex wrench 13 and
hex wrench 14, attach the pipe to the swivel caster. Using hex wrench 24 and 19, attach the front wheel
axle to the swivel casters and front tire.
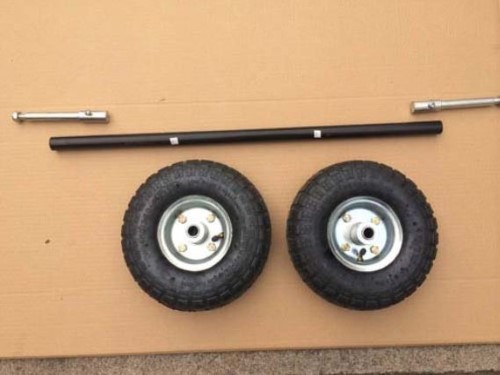
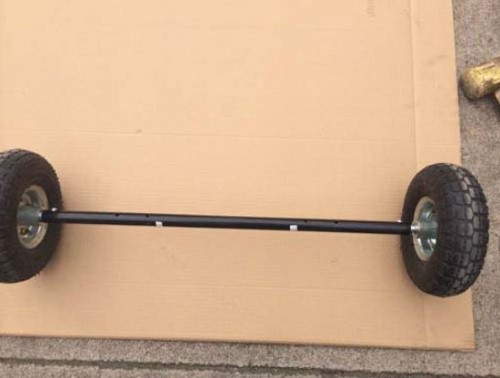
Step 2: Assemble the Rear Wheels
Use the pipe labeled #3 and #3 and the two rear wheel axles. Using hex wrench 5, attach the pipe to the
axles. You will notice the set screw in the axle that must be removed and secured through the pipe to
connect and hold the axle to the pipe. Put the tires onto the outside of the axle and tighten.
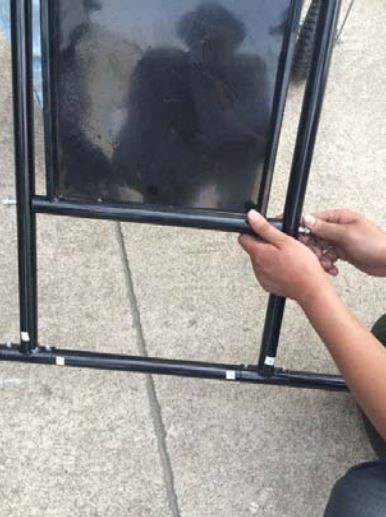
Step 3: Assemble All Pipes
In this step, you will attach all the pipes, based on the numbers. For example, find the pipes both labeled
with a #1 and connect them together, and so on.
Match the hole and tighten the hardware completely.
Note: Position 1 and position 2 on the top bar use 8pcs of the
M6x35 cross flat top bolts (#2). These bolts have a flat top to
ensure the kart will not be scratched by the kart stand. Use the
Philips head screwdriver and the hex wrench 10.
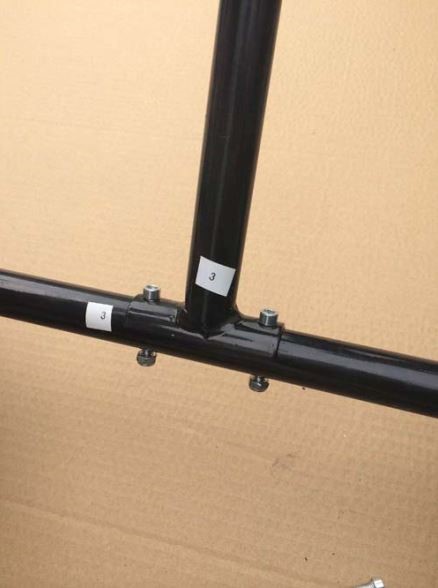
Note: Position 3 and position 4 (wheel bars) use hex top bolts
that are black in color. Use 8pcs of M6x35 hex bolts (#3) along
with the hex key 5 and hex wrench 10 to tighten.
For the center of the kart stand, connect pipe labeled #1 and #3 and pipe labeled #2 and #4 with 2pcs of
M8x60 hex bolts (#6). For the tools, use hex wrench 10 and 13.
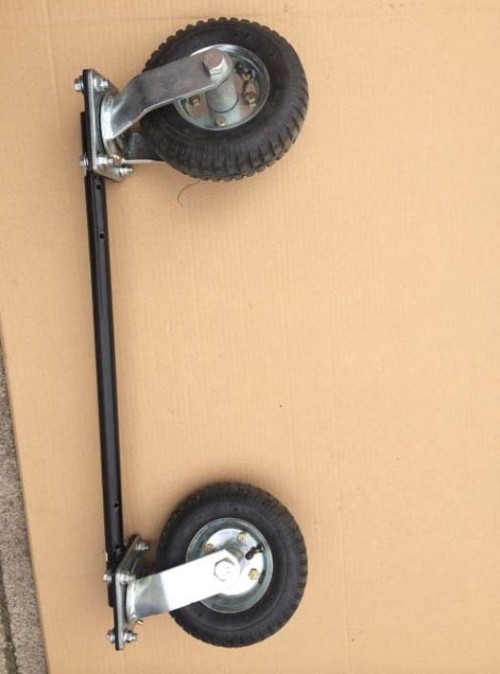
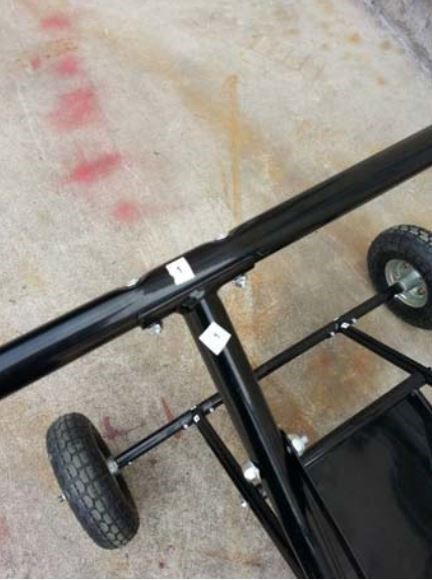
Step 4: Assemble The Folding Support Arms
When assembling the folding support arms, use 4pcs of the M8x40 hex bolts (#5), with hex wrench 10 and
13. Please pay careful attention to the below picture. You want to ensure that the folding arm is located on
the OUTSIDE of the pipes marked 1 and 3 (front of the kart stand with the swivel casters) and on the
INSIDE of the pipes marked 2 and 4 (rear of the kart stand with the larger tires).
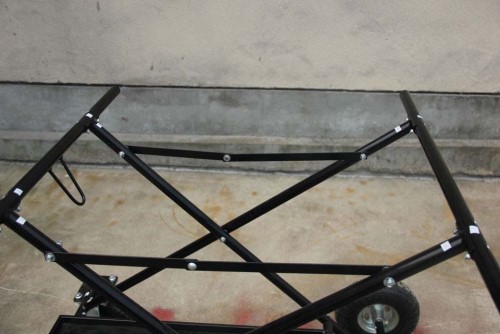
At this point, the kart stand should be able to stand up and turn easily. Now the kart can stand up and turn
easily.
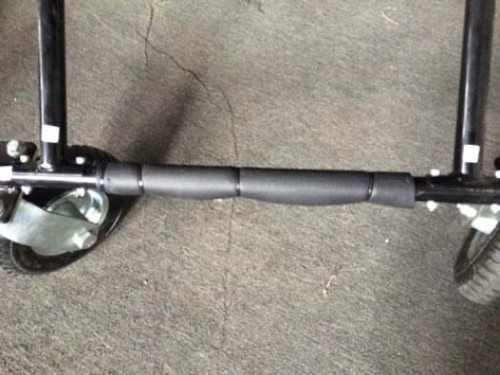
Assemble tool tray with 2pcs of M8x40 hex bolts (#4) with hex wrench 10. Install a piece of foam under
where the tool tray will lean on and fasten with zip ties.
Install the 4 remaining pieces of foam along the top supports, where the kart will sit. Attach with zip ties.
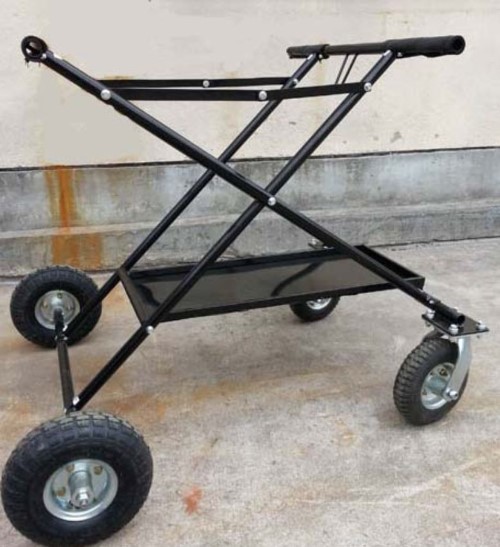
You should now have a completed kart trolley that looks like this picture. Enjoy!
