


PROJECT - Sean Pereira's race kart build
PROJECT - Sean Pereira's race kart build
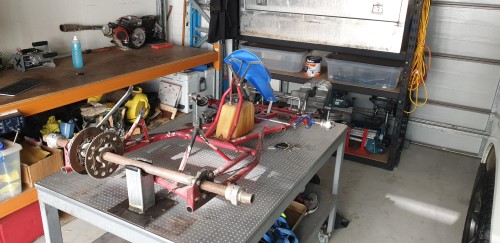
Following on from Sean's Drift-Style kart conversion, we're now treated to his latest project - a new race-style kart.
"And so it begins"
.jpg)
.jpeg)
.jpg)
.jpeg)
.jpg)
.jpeg)
.jpg)
.jpeg)
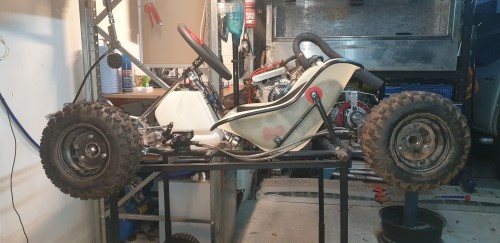
So, yer, I could only suppress my inner bogan for so long.
I probably didn't really need to love the seat in the end.
The speed calculator is putting me somewhat between 75km/h and 85 km m/h depending on RPMs. My goodness.
.jpg)
.jpeg)
I don't say it enough, but many thanks for your help during these adventures!
.jpeg)
.jpg)
.jpg)
.jpg)
.jpg)
.jpg)
.jpg)
.jpg)
.jpg)

We're back in the game baby!
.jpg)
.jpg)
.jpg)
.jpg)
.jpg)
.jpg)
.jpg)
.jpg)
Dresses up the edge nice, captures any fraying of the seat fibres
Think it cost my like $15 for that length...

------------------------------
Everything was running great, then the engine reminded me that maybe I didn't torque down the clutch bolt on the torque converter.
Pretty funny, but the safety cover did it's job, glad I went to the trouble of trimming and fitting it. I now need a few dollops of glue!
Also the exhaust wrap is amazing - no itch whatsoever! Also ceramic painted the muffler - come up sweet - it needed to bake in an oven for an hour at 200C and seems really durable.
.jpeg)
.jpg)
.jpg)
Just got to play with the RPM gauge to get it to read correctly, then do a final brake bleed (as you can imagine, the side of the caliper I didn't swap out the seals on NOW leaks) and she's ready to go Round 2! By Jeebus, it's loud so I try to keep neighbourly relations sweet by not cranking it past 5pm, so the RPM gauge adjustment will be tomorrow. Hopefully I can wrangle my mate to come over and do the brakes, it's just easier with 2 people.
Extra quality of life stuff was to mount an old phone for a GPS based speedo, ran the accelerator cable in a tiny copper tube so you don't accidentally stand on it on mount and dismount, re-mounted the seat with only 2-3mm stick out at the bottom (but kept the rest in parameters as per your seat graphic), made up a chain guard from some checkerplate I had, and had to cut down and make narrower the torque converter cover to allow for greater seat clearance.
So yer, throw her up on the interwebz, she's catwalk ready!
Cheers again for your help, if your eagle eyes are in, you'll notice the 150cc Chinesium motorbike donor for Phase 2 of the Money Puddle. Yikes.
Sean
.jpg)
.jpg)
.jpg)
.jpg)
.jpg)
.jpg)
.jpg)
.jpg)
.jpg)
.jpg)
.jpg)
.jpg)
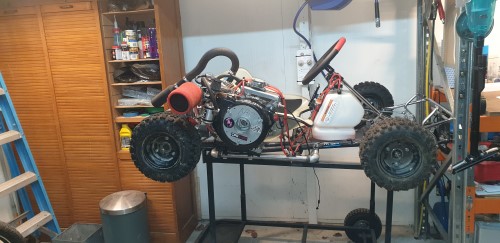
So, yer, I could only suppress my inner bogan for so long.
I probably didn't really need to love the seat in the end.
The speed calculator is putting me somewhat between 75km/h and 85 km m/h depending on RPMs. My goodness.
I might be jumping the gun slightly early, but that seemingly DOA $150 motorbike, finally got it to turn over after much soul searching, beer sacrifices to the Wiring Schematics Gods, and lengthy consultations with the professors at the Youtube University about how to hot wire a bike with a worn out ignition barrell. If she makes spark, the CDI is good and I'll service it and it will be good to go, if not, new CDI ($50) and its on anyways!
So, the 14th major hurdle I hit was that on the offroad kart, the engine sits behind the drive sprocket, not an issue with the pump motors, but motorbike engines seem to only work with the chain and driven wheel/sprocket located behind the engine. The gearbox assembly is in the way of the chain shooting forward of the engine. Thought it was all over red rover, then remembered...
...alas, I think I'm golden as the offroad kart is already set up, and more importantly welded up with the jackshaft arrangement you helped me do before! Sometimes you're so good at what you do, you help customers future-proof their next hair-brained builds well before they even think them up!